Step by Step on Growing Weed: Complete Home Cultivation Process
- Blog
- Step by Step on Growing Weed: Complete Home Cultivation Process
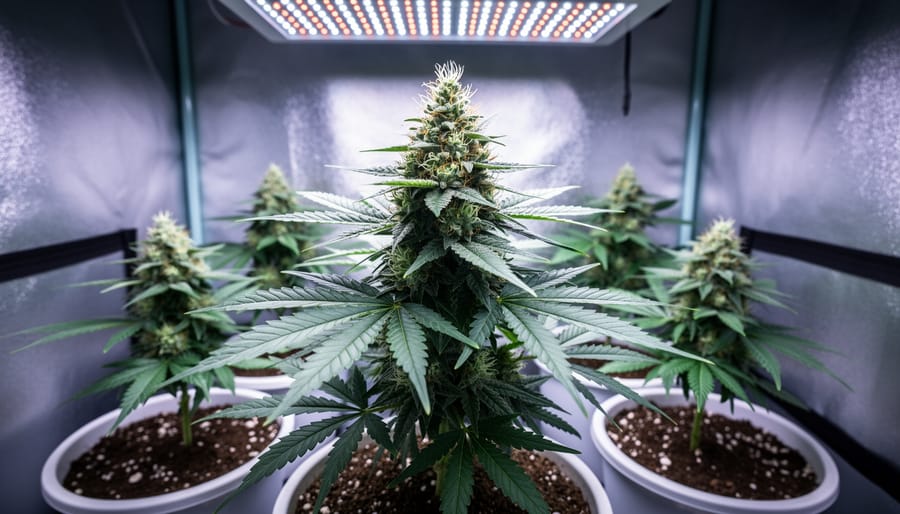
lynette
Growing weed successfully takes 8 to 16 weeks from seed to harvest, depending on your chosen strain and growing method. The process follows a clear sequence: germination, seedling care, vegetative growth, flowering induction, flower development, harvest timing, drying, and curing. Each phase requires specific environmental conditions, precise timing, and careful observation to maximize both yield and potency.
The cultivation timeline breaks down into distinct stages, each with measurable success markers. Germination takes 1 to 7 days, followed by a 2 to 3 week seedling phase. The vegetative stage runs 3 to 8 weeks as you build plant structure, while flowering consumes another 6 to 10 weeks as buds develop. Post-harvest processing adds 2 to 4 weeks of drying and curing before your cannabis reaches optimal quality.
Temperature, humidity, light cycles, and nutrient delivery must shift as your plants transition through these phases. A seedling thrives at 70-75°F with 65-70% humidity and gentle light, but a flowering plant needs 65-70°F, 40-50% humidity, and intense illumination for 12 hours daily. Understanding these shifting requirements prevents the most common failures: damping off in seedlings, nitrogen toxicity during flowering, premature harvest, and improper drying that destroys cannabinoid profiles.
This guide walks through each stage in order, detailing the environmental parameters, nutrition requirements, and verification methods you need to confirm your plants are progressing correctly. Whether you’re starting your first seed or refining your technique, following this sequential framework ensures you address each critical factor at the right moment in your plant’s development cycle.
Before you start growing cannabis, assembling the right tools and materials saves time and prevents costly mistakes mid-cultivation. Think of this as building your toolkit, quality equipment upfront means fewer interruptions and better results throughout the entire process.
Lighting Equipment
Grow lights are your most critical investment since indoor cannabis needs intense, full-spectrum light to thrive. LED lights offer the best efficiency and lower heat output, making them ideal for home growers working in tight spaces. For a small 2-4 plant setup, a 300-600 watt LED panel provides adequate coverage. High-pressure sodium (HPS) lights remain popular for flowering stages but generate significant heat requiring robust ventilation. Budget at least 18-24 hours of light daily during vegetative growth and exactly 12 hours during flowering.
Growing Containers and Medium
Start with 3-5 gallon fabric pots that promote healthy root development through air pruning and superior drainage. Plastic containers work but trap heat and restrict airflow around roots. For organic growing, choose living soil rich in beneficial microbes rather than sterile potting mix, look for products containing compost, worm castings, and mycorrhizae. Coco coir offers excellent water retention and aeration if you prefer more control over nutrients.
Essential Growing Supplies
Optional But Valuable Equipment
A jeweler’s loupe or digital microscope helps you inspect trichomes closely when determining harvest timing. TDS meters measure nutrient concentration in your water, preventing overfeeding that burns plants. Training clips and plant ties support low-stress training techniques that increase yields. Humidity domes assist seedlings during their vulnerable first weeks.
Investing in quality pH testing and environmental monitoring tools pays immediate dividends. Cheap meters drift out of calibration quickly, leading to nutrient lockout and stunted growth that takes weeks to correct.
Before starting your cannabis cultivation, addressing safety risks and understanding legal requirements protects both your grow operation and yourself. Proper planning in these areas prevents costly mistakes and ensures you can focus on growing quality plants.
Electrical Safety and Fire Prevention
Cannabis grows demand significant electrical capacity, grow lights, fans, dehumidifiers, and heaters can easily overload circuits. Use dedicated circuits rated for your equipment’s combined wattage, and never daisy-chain extension cords or power strips. Ground Fault Circuit Interrupter (GFCI) outlets prevent electrical shocks in humid grow environments, while surge protectors safeguard expensive equipment. Inspect all cords regularly for fraying or heat damage, keep electrical connections away from water sources, and ensure grow lights maintain proper clearance from plants and flammable materials.
High-intensity discharge (HID) lights generate substantial heat, so pair them with adequate ventilation and keep combustible materials at least three feet away. LED systems run cooler but still require airflow. Install smoke detectors in and near your grow space, and keep a fire extinguisher rated for electrical fires within easy reach.
Mold, Mildew, and Pest Management Safety
Poor ventilation creates conditions for powdery mildew and bud rot, which can destroy your entire crop. Maintain humidity between 40-70% (lower during flowering), ensure constant air circulation with oscillating fans, and install an exhaust system that exchanges air completely every 3-5 minutes. When treating pest problems, use organic solutions like neem oil or insecticidal soaps rather than harsh chemicals, you’ll eventually consume this plant. Always wear gloves and a mask when applying any treatment, even organic ones, and never spray during flowering as residues affect flavor and safety.
Legal Compliance and Secure Storage
Home cultivation laws vary dramatically by location. Most legal jurisdictions limit personal grows to 4-12 plants, require grows to occur in locked spaces inaccessible to minors, and prohibit visibility from public areas. Some regions mandate you own the property or have written landlord permission. Research your specific state, province, or country regulations before germinating a single seed, illegal growing carries criminal penalties including fines and jail time even in cannabis-friendly areas.
Secure your grow space with locks, keep detailed plant counts matching legal limits, and store all cannabis products in childproof containers separate from the grow area. Discretion matters: manage odors with carbon filters, and avoid discussing your grow publicly or on social media where it could create legal complications.

Germination transforms a dormant seed into a living plant by activating the embryo inside. You’ll notice a taproot emerge first, followed by the seed casing splitting to reveal the first leaves. Three reliable methods work for home cultivation, each with specific advantages.
The paper towel method offers visual monitoring throughout the process. Place your seeds between two damp paper towels on a plate, cover with another plate to create darkness, and keep the temperature between 68-77°F. Check daily and add water if the towels dry out. The water glass method starts by soaking seeds in a glass of room-temperature water placed in a dark cupboard. Seeds should sink within 24 hours, if they float after a day, gently tap them under the surface. Once you see taproots emerge (usually 24-48 hours), transfer immediately to your growing medium. Direct soil planting mimics nature: create a half-inch hole in moistened soil, drop the seed in pointed-end down, and lightly cover. Keep the soil surface moist but never waterlogged.
Successful germination shows a white taproot emerging from the seed crack. Handle sprouted seeds only by the seed casing, never touching the delicate root. Seeds that don’t crack after five days likely aren’t viable. Temperature drops below 65°F slow germination significantly, while anything above 80°F can damage the embryo permanently.
Once your seed cracks open and reveals a tiny white taproot, it’s time to move it into a growing medium. Handle the germinated seed gently, those fragile roots break easily. Plant it about half an inch deep in moist (not soaking) soil or your chosen medium, with the taproot pointing down. Cover lightly and keep the surface consistently damp using a spray bottle rather than pouring water directly, which can dislodge the seed.
Seedlings need strong light immediately to prevent stretching. Position LED grow lights 24-30 inches above the soil surface, or fluorescent tubes 2-4 inches away. Run your lights for 18-24 hours daily, cannabis seedlings thrive under near-constant light during this stage, building the energy reserves they need for vigorous growth. The extra hours won’t burn them; young plants lack the maturity to trigger flowering responses.
Humidity matters more now than at any other stage. Maintain 65-70% relative humidity around your seedlings, which helps them absorb water through their limited root system while their leaves develop. A humidity dome or clear plastic cup over individual seedlings works perfectly for the first week. Once the first set of serrated leaves (true leaves, not the round cotyledons) fully opens, you can gradually remove the dome.
Water sparingly but consistently. The soil should stay moist an inch below the surface but never waterlogged. Overwatering kills more seedlings than underwatering, roots need oxygen, and soggy soil suffocates them. Check daily by feeling the soil weight or inserting your finger to the first knuckle.
Healthy seedlings show vibrant green color, stand upright without support, and produce new leaf sets every few days. This stage lasts 2-3 weeks until plants develop 4-6 nodes and a robust root system ready for vegetative growth.
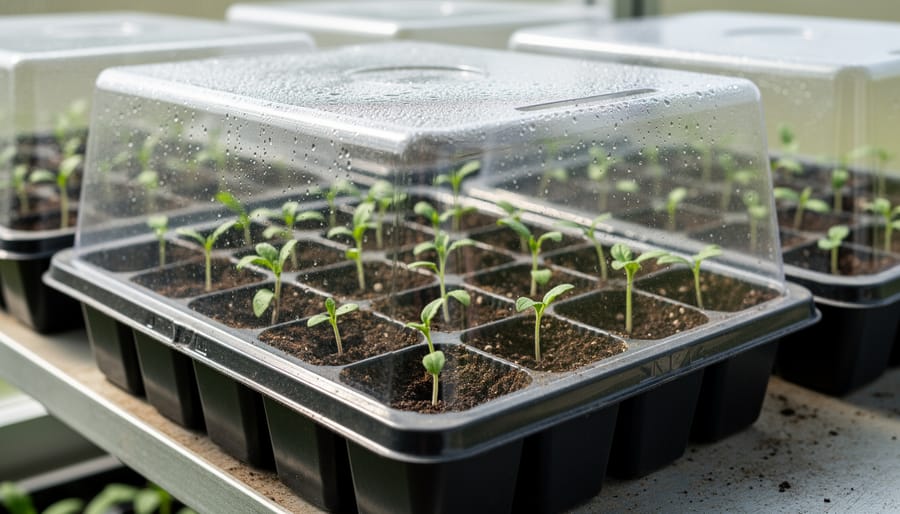
Once your seedlings develop their first true set of serrated leaves, they enter the vegetative growth phase, the engine room of your cannabis cultivation. This stage builds the plant structure that will support your eventual harvest, and your decisions here directly impact final yield.
Switch your lighting schedule to 18 hours on and 6 hours off. Cannabis is a C3 plant, meaning it only photosynthesizes during light periods. Those 18 hours give your plants maximum energy production while the 6-hour dark period allows for cellular repair and root development. Some growers run 24-hour light, but the dark period produces stronger, more resilient plants without sacrificing growth rate.
Your nutrient strategy shifts dramatically now. Nitrogen drives vegetative growth by forming amino acids and chlorophyll, the molecules that capture light energy and build plant tissue. Increase your feeding to a vegetative formula with an NPK ratio around 3-1-2, starting at quarter strength and building to full strength over two weeks. Feed every other watering, and always check that your pH stays between 6.0 and 7.0 for soil or 5.5 to 6.5 for hydroponics. Nitrogen deficiency shows as yellowing lower leaves, while excess causes dark green, clawed foliage.
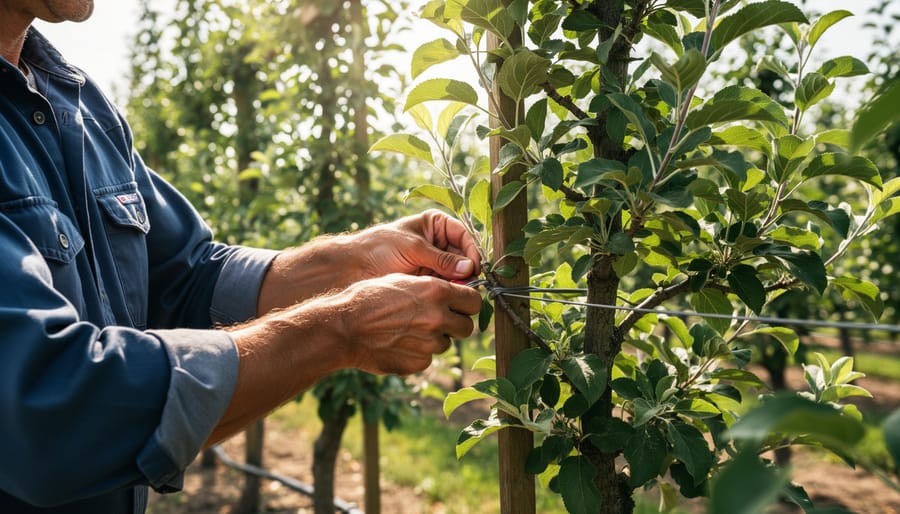
Training techniques maximize your canopy without adding plants. Topping means cutting off the main stem above the fourth or fifth node, which splits the growth into two main colas and creates a bushier shape. Low stress training bends branches horizontally and ties them down, exposing lower growth sites to direct light without cutting anything. Mainlining combines topping with aggressive pruning to create eight identical main colas, it takes longer but produces extremely uniform buds.
The vegetative phase lasts as long as you let it. Small plants ready for flowering in three weeks will yield less than plants vegged for eight weeks. Most growers flip to flowering when plants reach half their desired final height, since they typically double in size during early flowering. Watch for alternating nodes rather than symmetrical pairs, this signals sexual maturity and readiness for the next phase.
Flowering begins when you switch your lights from the vegetative 18/6 schedule to 12 hours on, 12 hours off. This dramatic change in light exposure mimics the natural transition from summer to fall, triggering your plants’ reproductive phase. Make this switch abruptly, no gradual transition needed. Within 1-3 weeks, you’ll see the first signs of flowering: small white hairs (pistils) on females or small pollen sacs on males emerging at the nodes where branches meet the main stem.
The 12-hour dark period must be absolutely uninterrupted. Even a small light leak from an indicator LED or crack in your grow space can confuse your plants and delay flowering or cause them to revert to vegetative growth. Inspect your space during the dark period to ensure complete darkness.
Immediately adjust your nutrient formula when you switch the light cycle. Reduce nitrogen levels and increase phosphorus and potassium, which support bud formation and density. Most nutrient lines offer specific “bloom” formulas with this adjusted NPK ratio. Start at half the recommended strength and increase gradually based on how your plants respond, watching for burnt leaf tips that signal overfeeding.
This is your critical window to identify and remove male plants unless you’re intentionally breeding. Males develop small, round pollen sacs that cluster like tiny bunches of grapes, while females show wispy white pistils. Check every plant carefully within the first two weeks of flowering. One unnoticed male can pollinate your entire crop, directing energy into seed production instead of the resinous buds you want. Remove males immediately by carefully bagging them before carrying them out of your grow space.
Expect significant vertical growth during the first 2-3 weeks of flowering, commonly called “the stretch.” Most strains double in height during this period, with some sativas tripling. Plan your space accordingly before switching to flowering.
Lower your humidity to 40-50% to reduce the risk of mold and bud rot as flowers develop. Increase air circulation with oscillating fans, ensuring gentle but constant movement throughout the canopy.
Your plants demand close attention during weeks 4-12 of flowering as buds swell and resin production peaks. Check trichomes twice weekly using a jeweler’s loupe or digital microscope, look for milky white trichomes with 10-30% turning amber for peak THC content. Clear trichomes mean it’s too early; fully amber indicates degraded THC converting to CBN.
Adjust your feeding schedule as flowering progresses. Continue bloom nutrients high in phosphorus and potassium, but reduce nitrogen to 25% of vegetative levels. Week 4-6 marks peak feeding, follow manufacturer guidelines but watch for nutrient burn (brown, crispy leaf tips). By week 7-8, gradually taper nutrients by 25% each week as plants naturally slow uptake.
Heavy colas need physical support to prevent branches snapping. Install bamboo stakes or trellis netting before buds become too dense. Tie branches gently with soft plant ties, creating support loops rather than tight bindings that restrict nutrient flow.
Maintain temperature between 65-75°F throughout mid-to-late flowering. Temperatures above 77°F stress plants and degrade terpenes, reducing aroma and potency. Drop humidity to 40-45% by week 6 to prevent bud rot, dense flowers trap moisture, creating perfect conditions for botrytis (gray mold). If you spot fuzzy gray or brown patches on buds, remove affected material immediately and increase air circulation.
Inspect daily for spider mites and thrush worms, which target resinous buds. Spider mites leave tiny yellow speckles on leaves with fine webbing; thrush worms bore into colas, leaving frass (sawdust-like droppings). Avoid harsh pesticides this late, use organic options like neem oil (weeks 4-6 only) or introduce predatory insects.
Keep light cycles strict at 12/12, even brief light interruptions during dark periods can trigger re-vegging, halting bud development. The total flowering duration spans 6-12 weeks depending on strain genetics, with indicas finishing faster than sativas.

Flushing marks the final preparation phase before you harvest your plants. During the last one to two weeks of flowering, stop feeding nutrients entirely and give your plants only pH-balanced water (6.0-7.0 in soil, 5.5-6.5 in hydro). This process forces the plant to metabolize stored nutrients in its leaves and buds, drawing down accumulated salts and minerals.
The scientific rationale centers on nutrient accumulation throughout the growing cycle. Cannabis plants absorb nitrogen, phosphorus, potassium, and trace minerals that remain in plant tissue. When these excess nutrients persist through harvest, they create harsh smoke characterized by crackling, chemical taste, and throat irritation. Flushing allows the plant to consume these stored elements, converting them into energy for final bud development while clearing residual salts from the root zone.
Water your plants as you normally would during flushing, but replace nutrient solution with plain water adjusted to the correct pH. You’ll notice fan leaves yellowing and fading, this is the desired response, indicating the plant is pulling nitrogen from foliage. Don’t panic when leaves pale; the plant is redistributing its resources to finish ripening the flowers.
The impact on final quality is substantial. Properly flushed cannabis burns to white or light gray ash, tastes clean, and delivers smooth inhalation without harshness. Unflushed buds leave dark, oily ash and carry a chemical aftertaste that masks the strain’s natural terpene profile. This two-week window significantly improves the smoking or vaping experience.
Harvesting at the right moment determines your final product’s potency and effects. The difference between harvesting too early and waiting for peak maturity can mean weaker effects versus the full therapeutic potential your plants developed over months of careful growth.
Check trichomes with a jeweler’s loupe or digital microscope at 60x magnification minimum. Focus on the resin glands covering the buds themselves, not the sugar leaves, which mature faster and give misleading signals. Clear trichomes indicate immaturity, THC hasn’t fully developed yet. When 70-90% turn cloudy or milky white, THC reaches maximum concentration, producing energetic, cerebral effects. As trichomes shift to amber (10-30% amber mixed with cloudy), THC begins converting to CBN, creating heavier, more sedative effects. Most growers harvest when trichomes show mostly cloudy with 10-20% amber for balanced potency.
Check multiple bud sites across different parts of the plant since top colas often mature before lower branches. Inspect daily during the final week, trichome color changes rapidly once the shift begins.
For cutting, use clean, sharp pruning shears sterilized with rubbing alcohol. Cut branches at a comfortable length for your drying space, typically 12-16 inches. Handle buds by the stems only; touching the flowers directly crushes trichomes and degrades quality.
Wet trimming means removing fan leaves and sugar leaves immediately after cutting, while the plant moisture makes leaves easier to remove. Dry trimming waits until after the drying phase, when leaves curl away from buds naturally. Wet trimming speeds drying (good for humid climates) but can create harsher smoke. Dry trimming preserves more terpenes and produces smoother results but requires more time and lower humidity during drying. Work in a cool space, warm temperatures evaporate terpenes during trimming.
After harvest, your cannabis still needs 3-6 weeks of proper drying and curing to reach its full potential. This final step transforms harsh, chlorophyll-heavy buds into smooth, flavorful cannabis with preserved terpenes and cannabinoids.
Start by hanging your trimmed branches upside down in a dark room. Darkness prevents cannabinoid degradation from light exposure. Set your environment to 60-70°F with 50-60% humidity. Too warm or humid invites mold, while excessive dryness causes the outside to crisp before interior moisture distributes evenly.
Your buds need 7-14 days to dry properly. Stems should snap rather than bend when ready. If they merely fold, interior moisture remains too high and will cause jar mold.
Once dry, trim off stems and place buds loosely in glass mason jars, filling them 75% full. Seal the jars and store them in a cool, dark location.
During the first two weeks, open each jar once daily for 10-15 minutes. This “burping” releases built-up moisture and replenishes oxygen. If you notice ammonia smell or excess condensation, your buds went into jars too wet. Leave the lids off for several hours, then resume burping.
After two weeks of daily burping, reduce to once every few days. The curing process continues for weeks. Minimum viable cure takes two weeks, but 4-8 weeks produces noticeably smoother, more aromatic cannabis.
During curing, enzymes and aerobic bacteria break down residual chlorophyll, which causes the harsh “green” taste in uncured cannabis. Simultaneously, the controlled environment preserves volatile terpenes that would otherwise evaporate and allows cannabinoids to reach chemical stability. Well-cured cannabis can remain potent for a year or longer when stored properly.

Knowing whether your grow succeeded requires checking specific indicators at each stage and evaluating your final product against quality benchmarks. Start by reviewing the entire process: healthy seedlings should have emerged within 72 hours of germination, vegetative growth should have produced strong stems and vibrant green leaves, flowering should have triggered within two weeks of switching to 12/12 lighting, and trichomes should have transitioned from clear to cloudy at harvest time.
Your final product reveals the most about your cultivation success. Inspect the dried buds closely, they should be dense but not rock-hard, covered in visible trichomes that sparkle under light, and show vibrant colors with orange or reddish pistils. The structure should be intact, not crumbly or overly compressed. Squeeze a bud gently: it should have some give but spring back, indicating proper moisture content between 55-65% relative humidity.
The aroma profile provides crucial feedback about your growing and curing process. Well-grown cannabis produces strong, distinct terpene scents that can range from citrus and pine to earthy or sweet notes, depending on the strain. If your buds smell like hay, grass, or have minimal scent, the curing process was likely rushed or the plants were harvested too early. Ammonia or musty odors indicate excess moisture and potential mold development.
Here are key success indicators and warning signs to check:
Test moisture content by checking the stems: they should snap cleanly rather than bend. If they bend, continue drying. For potency assessment, look for generous trichome coverage and intact resin glands, damaged or missing trichomes mean lost cannabinoids through rough handling.
Troubleshooting requires honest evaluation. Small, disappointing yields usually stem from inadequate lighting, too-short vegetative periods, or nutrient deficiencies during flowering. If multiple problems occurred throughout your grow, review your notes to identify where things went wrong, then adjust your approach for the next cycle.
The complete process takes 3-6 months depending on strain and desired plant size. This includes 2-3 weeks for seedling stage, 3-16 weeks of vegetative growth, 6-12 weeks of flowering, and 2-8 weeks for drying and curing.
First-time growers can succeed by following proven methods and maintaining consistent conditions. Start with one or two plants to keep things manageable while you learn to recognize plant signals and adjust your approach.
A closet or spare corner measuring 2×2 feet can accommodate 1-2 plants. Factor in vertical space of at least 4-5 feet to allow for lights, plants, and air circulation equipment.
Basic equipment (lights, tent, ventilation, nutrients) runs $300-600 for a small setup. Ongoing costs for electricity and supplies average $30-50 per month, which typically pays for itself after your first harvest.
Beyond these fundamentals, growers often wonder about specific challenges they’ll face during cultivation. Yellow leaves usually signal nitrogen deficiency during vegetative growth or natural fade during late flowering. If plants stretch tall with weak stems, your lights are positioned too far away or lack sufficient intensity. Slow growth indicates either overwatering, root problems, or incorrect pH preventing nutrient uptake.
Temperature swings stress plants and slow development, so maintain stable conditions between 65-75°F. Most beginners overwater rather than underwater, cannabis roots need oxygen, so let the top inch of soil dry before watering again. When you spot problems early and adjust one variable at a time, you can correct issues before they impact your final yield.
Your first grow teaches you more than any guide can convey. You’ll learn to read your specific plants, understand how they respond to your environment, and develop instincts for timing. Each cycle builds skills that make the next grow smoother and more productive.
You now have a complete roadmap for growing weed step by step, from selecting your seeds through germination, vegetative growth, flowering, harvest, drying, and curing. Each stage builds on the previous one, and while the process requires attention and patience, it’s remarkably achievable once you understand the sequence and requirements.
Starting with just one or two plants is the smartest approach for your first grow. You’ll learn the rhythm of watering, how your specific environment affects growth, and how to read your plants’ signals without feeling overwhelmed. Every grower makes mistakes, overwatering a seedling, harvesting slightly early, or misjudging nutrient strength, but each cycle teaches you something that makes the next one better.
The beauty of cannabis cultivation is that it rewards consistency and observation more than perfection. Your second grow will be noticeably better than your first, and by your third or fourth cycle, you’ll have developed instincts that no guide can fully teach. You’ll recognize subtle leaf changes, understand your specific space’s quirks, and know exactly when your plants are ready for the next stage.
Track your process with simple notes, germination dates, feeding schedules, environmental readings, and observations. These records become invaluable references that help you replicate successes and avoid repeating mistakes.
For more detailed guidance on specific techniques and challenges, explore our broader collection of Step-by-Step Cannabis Growing Guides. The community of home growers continues to expand, and sharing experiences helps everyone improve their results while enjoying this rewarding hobby.
© Copyright 2026 Cultivating Homegrown Organic Marijuana